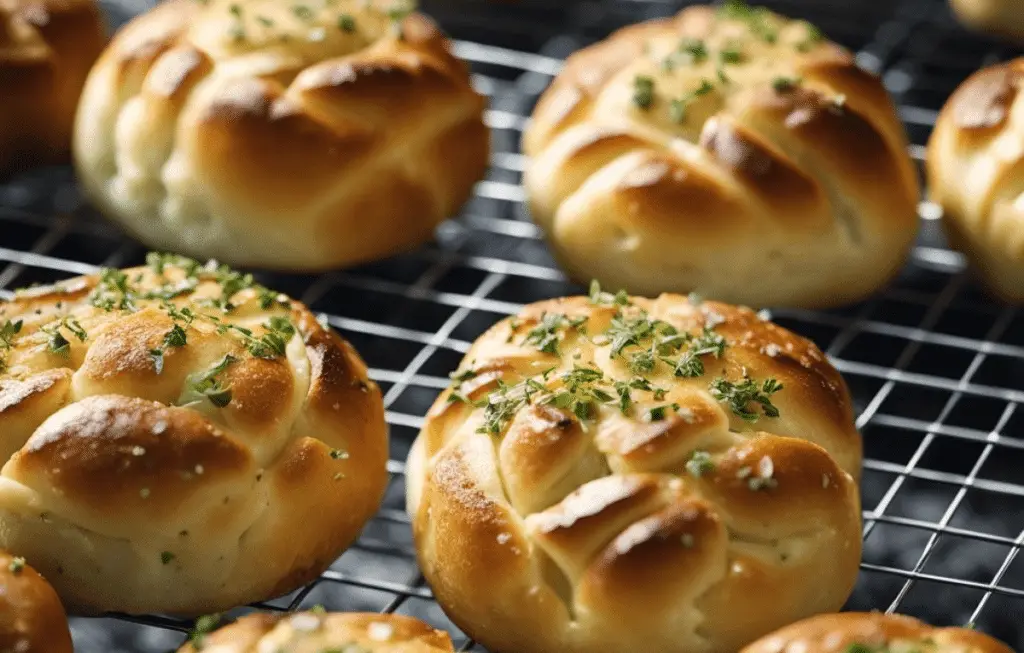
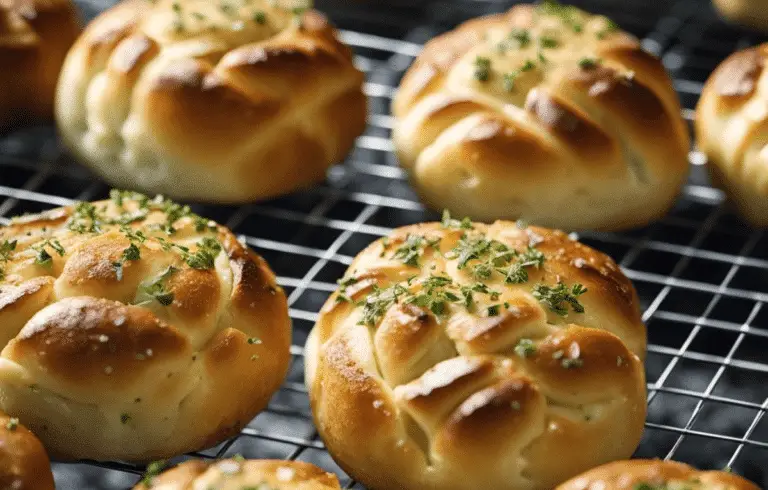
Welcome to the ultimate guide for making the most delightful garlic bread rolls! These rolls are not just a treat for the holidays but a perfect addition to any meal, making them an all-year-round favorite. Soft, fluffy, and infused with the rich flavors of garlic herb butter, these rolls are sure to be a hit at your dinner table.
Table of Contents
Why You’ll Love Garlic Bread Rolls

1. Homemade Goodness
Nothing beats the freshness and taste of homemade bread. These garlic rolls, made from scratch, are far superior to any store-bought variety.
2. Soft and Fluffy Texture
Each roll is a bite of heaven with its incredibly soft and fluffy texture, making it impossible to stop at just one.
3. Versatile Side Dish
Perfect for Thanksgiving, Christmas, or alongside any hearty meal, these rolls are as versatile as they are delicious.
Garlic Bread Rolls Ingredients
Key Ingredients
- Instant Yeast: For quicker rise times without flavor compromise.
- Fresh Garlic Cloves: Essential for that punchy garlic flavor.
- Parsley: Fresh herbs add depth; thyme or oregano are great alternatives.
- Granulated Sugar: Or substitute with honey for a natural sweetener.
- Milk: Whole or 2% milk enriches the rolls’ flavor and structure.
Step-By-Step to Make Garlic Bread Rolls
Preparing the Dough
- Garlic Herb Butter: Start by cooking butter and garlic, then set aside to cool.
- Kneading: Combine warm milk, yeast, sugar, flour, salt, melted butter, parsley, and egg in a stand mixer. Knead until smooth and tacky.
Shaping and Baking
- Portioning: Divide the dough into 12 equal pieces, each weighing about 67 grams.
- Shaping: Roll each piece into a smooth ball and place in a buttered baking dish.
- Rising: Let the rolls rise for 20-30 minutes.
- Baking: Brush with egg wash and bake until golden brown.
Finishing Touches
- Garlic Butter Glaze: Brush the freshly baked rolls with garlic herb butter for that extra flavor.
Baking Tips
- Use a Stand Mixer: This makes kneading easier, but hand kneading is also possible.
- Follow the Recipe Precisely: Ensure you have all ingredients and understand the steps before starting.
- Accurate Measurements: For best results, use a kitchen scale for precise ingredient measurements.
Serving Suggestions
Serve these garlic bread rolls with your favorite holiday dishes like Thanksgiving turkey or alongside a savory bread pudding. They’re a perfect complement to any meal!
Storage and Freezing
- Room Temperature: Keep leftovers in an airtight container for 1-2 days.
- Freezer-Friendly: Cool completely before storing in an airtight container for 2-3 months.
Recipe
Here’s a quick recap of the recipe for these heavenly garlic bread rolls:
- Ingredients: Instant yeast, fresh garlic, parsley, granulated sugar, milk, and other pantry staples.
- Preparation: Make garlic herb butter, knead the dough, let it rise, shape, and bake.
- Baking Time: Approximately 23-25 minutes at 350 F/180 C.
- Final Touch: Brush with garlic herb butter post-baking.
Reviews
Don’t just take my word for it, try this recipe out and see for yourself why these garlic bread rolls are a crowd favorite. They’re perfect for any occasion, be it a festive holiday meal or a cozy family dinner.
Conclusion
These homemade garlic bread rolls are a delightful addition to any meal. Their soft, fluffy texture, combined with the rich flavor of garlic herb butter, makes them irresistible. By following this guide, you’ll be able to create a batch of these delicious rolls that are perfect for sharing with family and friends.
Don’t forget to check out our other popular recipes like the Brownie Cookies for more baking inspiration!
FAQs
What is the name of the garlic bread?
The garlic bread described in the recipe is known as “Garlic Bread Rolls.” These are soft, fluffy dinner rolls that are generously brushed with a savory garlic herb butter, offering a delightful twist to traditional dinner rolls.
What can I do with store-bought rolls?
To enhance store-bought rolls, consider adding your own flavors. Brush them with garlic butter or olive oil mixed with herbs for a fresh taste. Alternatively, slice and fill them with cheese and ham for mini sandwiches, or use them as the base for bread pudding or a savory casserole. They can also be toasted and used for dips or as croutons in soups and salads.
How do you make store rolls better?
Improve store-bought rolls by warming them in the oven after brushing them with a mixture of melted butter, garlic, and herbs. For a cheesy twist, sprinkle grated cheese on top before baking. You can also infuse them with new flavors by injecting them with a garlic or herb-infused oil, or simply serve them with a variety of flavored butters or spreads.
How do you dress up plain rolls?
Dress up plain rolls by stuffing them with a mixture of cheese and cooked bacon or sausage, then baking until the cheese melts. Another option is to brush them with a sweet glaze made from honey and butter, topped with a sprinkle of sea salt. For a festive touch, tie them with chives or thinly sliced green onions to make them look like little gift packages. Serving them with a selection of dips, like herb-infused olive oil, creamy spinach dip, or a tangy tomato sauce can also elevate their appeal.
Garlic Butter Bread Rolls Recipe
Garlic bread rolls are soft and fluffy dinner rolls brushed with delicious garlic herb butter that make an excellent side to any meal, especially Thanksgiving and holiday meals! They make the ideal complement to your holiday table!
- Total Time: 1 hour 10 minutes
Ingredients
For the Dough:
- 4 ½ tablespoons of unsalted butter
- 1 ½ tablespoons of finely minced garlic
- 1 cup of whole or 2% milk, heated to 110 F
- 1 tablespoon of granulated sugar
- 2 ¼ teaspoons of instant yeast
- 3 ½ cups plus 1 tablespoon of all-purpose flour
- 1 large egg at room temperature
- 3 tablespoons of freshly chopped parsley
- 1 teaspoon of fine sea salt
For the Garlic Butter:
- 2 tablespoons of unsalted butter
- 2 teaspoons of minced garlic
- 1 tablespoon of chopped fresh parsley
- Optional flaky sea salt for garnish
Instructions
- Begin by preheating your oven to 350 F (180 C). Prepare a 9×13 baking pan by lightly buttering the bottom and sides. For metal pans, line the bottom with parchment paper.
- Melt 4 ½ tablespoons of butter in a small pot, add 1 ½ tablespoons of minced garlic, and cook until the aroma is released. Let it cool for 5 minutes.
- In your stand mixer’s bowl, mix the warm milk, sugar, and yeast. Add the cooled garlic butter, egg, flour, salt, and parsley. Knead using the dough hook on low speed for 8 minutes until the dough is smooth.
- Divide the dough into 12 equal portions, each weighing about 67 grams. Form each portion into a smooth ball and place them in the prepared pan.
- Cover the pan with a towel and let the dough rise for 30 minutes.
- Brush the tops of the rolls with a lightly beaten egg and bake for 23-25 minutes until they turn a lovely golden brown.
- While the rolls are baking, prepare the garlic butter. Melt 2 tablespoons of butter, add 2 teaspoons of minced garlic, cook briefly, then mix in 1 tablespoon of parsley.
- Once the rolls are baked, brush them generously with the prepared garlic butter and sprinkle with flaky sea salt if desired.
Notes
- Using a stand mixer makes the kneading process easier, but hand kneading is also possible.
- Read through the recipe beforehand and prepare all ingredients for a smooth baking process.
- Store leftovers in an airtight container at room temperature for up to 2 days or freeze for longer storage.
- Prep Time: 50
- Cook Time: 20
- Cuisine: American


